
Overview #
Asset audits help your organisation confirm that physical assets match the information recorded in AssetIQ. Regular audits improve asset-data accuracy, identify missing or incorrectly recorded assets, and provide greater visibility across locations and business units.
AssetIQ provides a structured process for planning an audit, assigning responsibility, verifying assets, recording findings and reviewing the completed results.
What is an asset audit? #
An asset audit is a systematic review of selected assets within your organisation. During an audit, authorised users compare physical assets against the corresponding records in AssetIQ.
An audit can help confirm information such as:
- Whether an asset can be physically located
- Whether the correct asset has been identified
- Whether its recorded location is accurate
- Whether its status and assignment are current
- Whether any discrepancies require investigation
- Whether the asset record needs to be updated
The exact information reviewed may depend on the audit type and your organisation’s audit procedures.
Why conduct asset audits? #
Asset information can become outdated when assets are moved, assigned, returned, stored or removed from service without the corresponding record being updated.
Regular asset audits can help your organisation:
- Maintain an accurate asset register
- Locate missing or misplaced assets
- Identify incorrect locations or assignments
- Confirm that assets remain in active use
- Improve accountability for company equipment
- Support internal controls and compliance activities
- Produce reliable information for operational and management reporting
Important: An asset audit identifies differences between the physical asset and its AssetIQ record. Review each discrepancy carefully before changing the master asset information.
How the asset-audit process works #
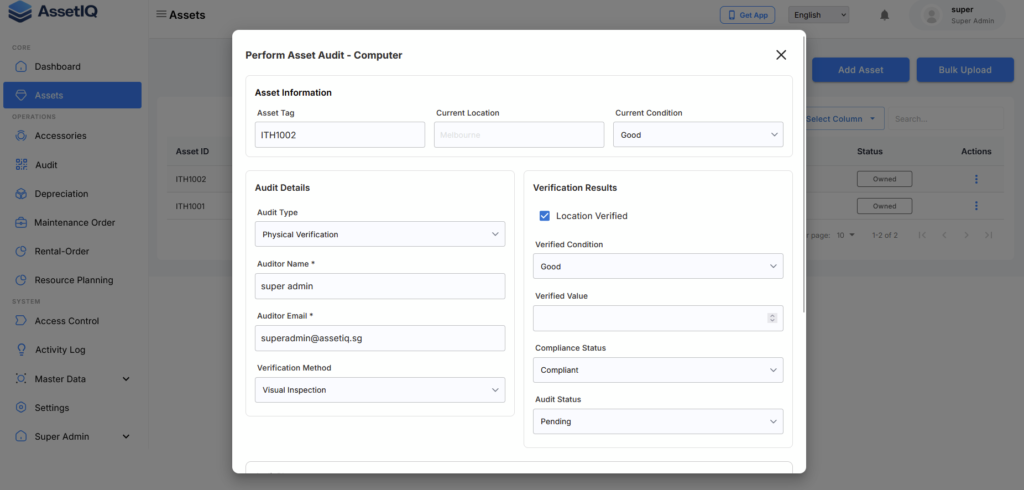
A typical AssetIQ audit follows these stages:
1. Select the audit type #
Choose the audit type that matches the purpose and scope of the activity. The available audit types may depend on how AssetIQ has been configured for your organisation.
See Understand Asset Audit Types for more information.
2. Define the audit scope #
Identify the assets that need to be audited. The scope may be based on criteria such as location, category, business unit or another relevant grouping.
A clearly defined scope helps auditors understand which assets must be verified.
3. Create and assign the audit #
Create the audit record, enter the required details and assign it to the appropriate user or team.
See Create and Assign an Asset Audit for step-by-step instructions.
4. Conduct the audit #
The assigned auditor verifies the relevant physical assets and records the results in AssetIQ. Depending on your organisation’s process, this may involve locating the asset, checking its information and recording any differences.
See Conduct and Submit an Asset Audit for detailed instructions.
5. Review discrepancies #
After the audit is submitted, review any differences identified during verification. A discrepancy could indicate that an asset is missing, located elsewhere or recorded with outdated information.
See Review Audit Discrepancies to learn how to examine and follow up on audit findings.
6. Review or export the results #
Audit results provide a record of the assets reviewed and the outcome of the audit. Where available, results can be exported for further analysis, reporting or record keeping.
See Export Asset Audit Results for instructions.
Before you begin #
Before creating an asset audit, make sure that:
- The relevant assets have been added to AssetIQ
- Asset details are reasonably complete and current
- Required locations, categories and business units have been configured
- The correct audit type is available
- The responsible auditor has access to the required assets and audit functions
- The audit scope and expected completion date are understood
If the required organisational information has not yet been configured, see Set Up Master Data.
Who can manage asset audits? #
Access to asset-audit functions depends on the permissions assigned to your AssetIQ role.
Depending on your permissions, you may be able to:
- View available audits
- Create an audit
- Assign an audit to another user
- Conduct asset verification
- Submit audit results
- Review discrepancies
- View or export completed audit information
If an expected audit action is unavailable, contact your AssetIQ administrator to confirm your role and permissions.
Recommended practices #
For more reliable audit results:
- Define a clear and manageable audit scope
- Confirm asset records are up to date before starting
- Assign the audit to users familiar with the relevant location
- Record findings while physically verifying each asset
- Avoid marking an asset as verified without checking it
- Add sufficient information when recording a discrepancy
- Review and resolve discrepancies promptly
- Retain exported results when required by your organisation’s policies
Next steps #
Continue with the following guides:


